Garden Journal

Garden Journal: Gardening Season Has Begun at Sunset Green Home!

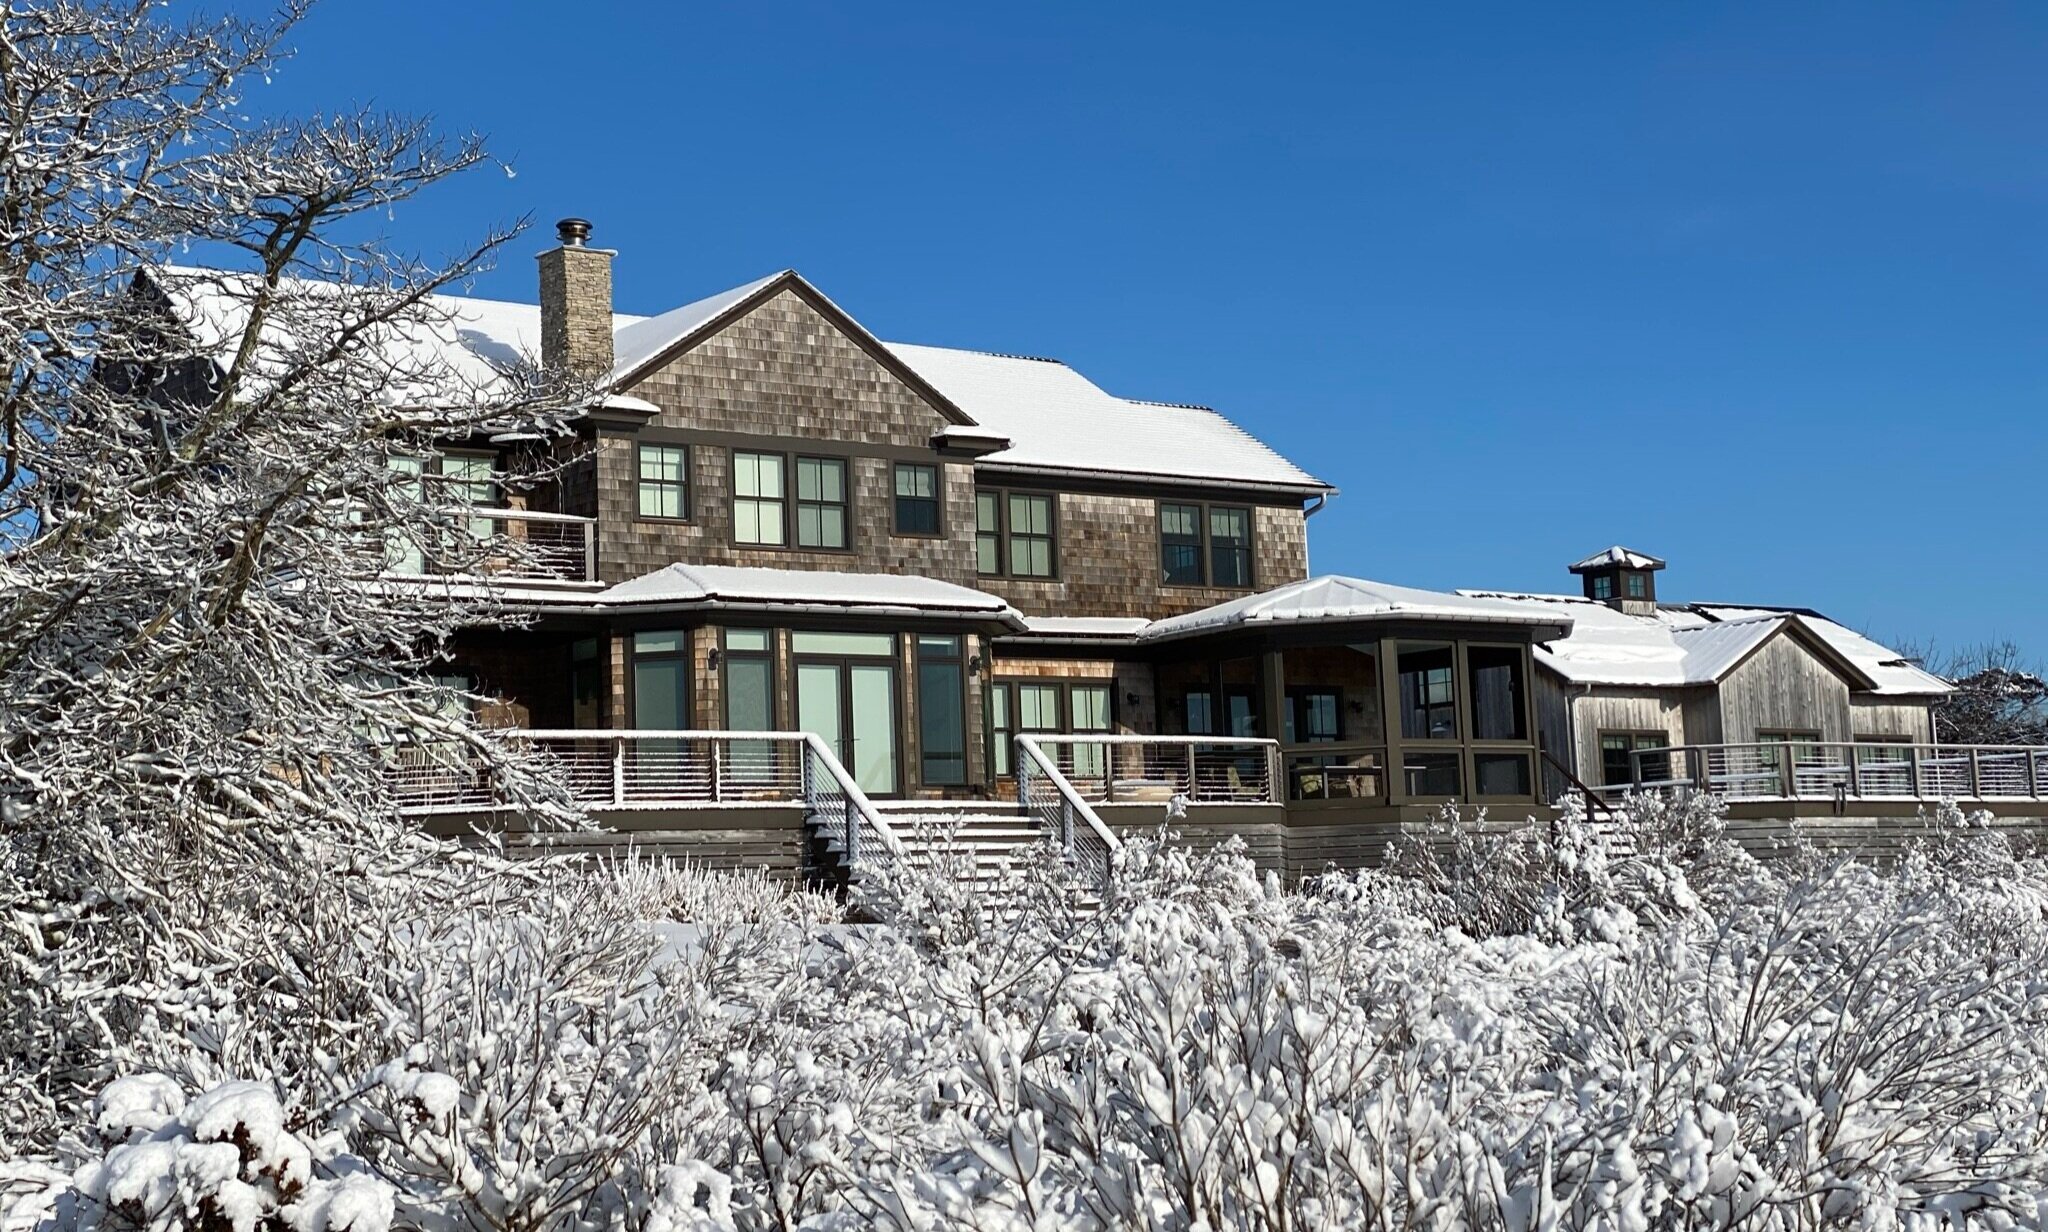
Hard to believe this was less than four weeks ago. 

Aftermath of February 7, 2021 Snow Storm

Aftermath of February 7, 2021 Snow Storm

Today, all of the snow is gone and I am seeing myriad signs that spring is around the corner. Flocks of Canada geese are flying by.  Daffodil and tulip bulbs planted in the fall are pushing up through the ground.  The weather forecast is calling for temperatures above 50 degrees three days this week. 

If you have been following us, you know that we use organic gardening methods and grow nearly all of our produce from seed, which we ordered this year from Seeds Savers Exchange, Fruition Seeds and several other purveyors of organic heirloom seeds. 

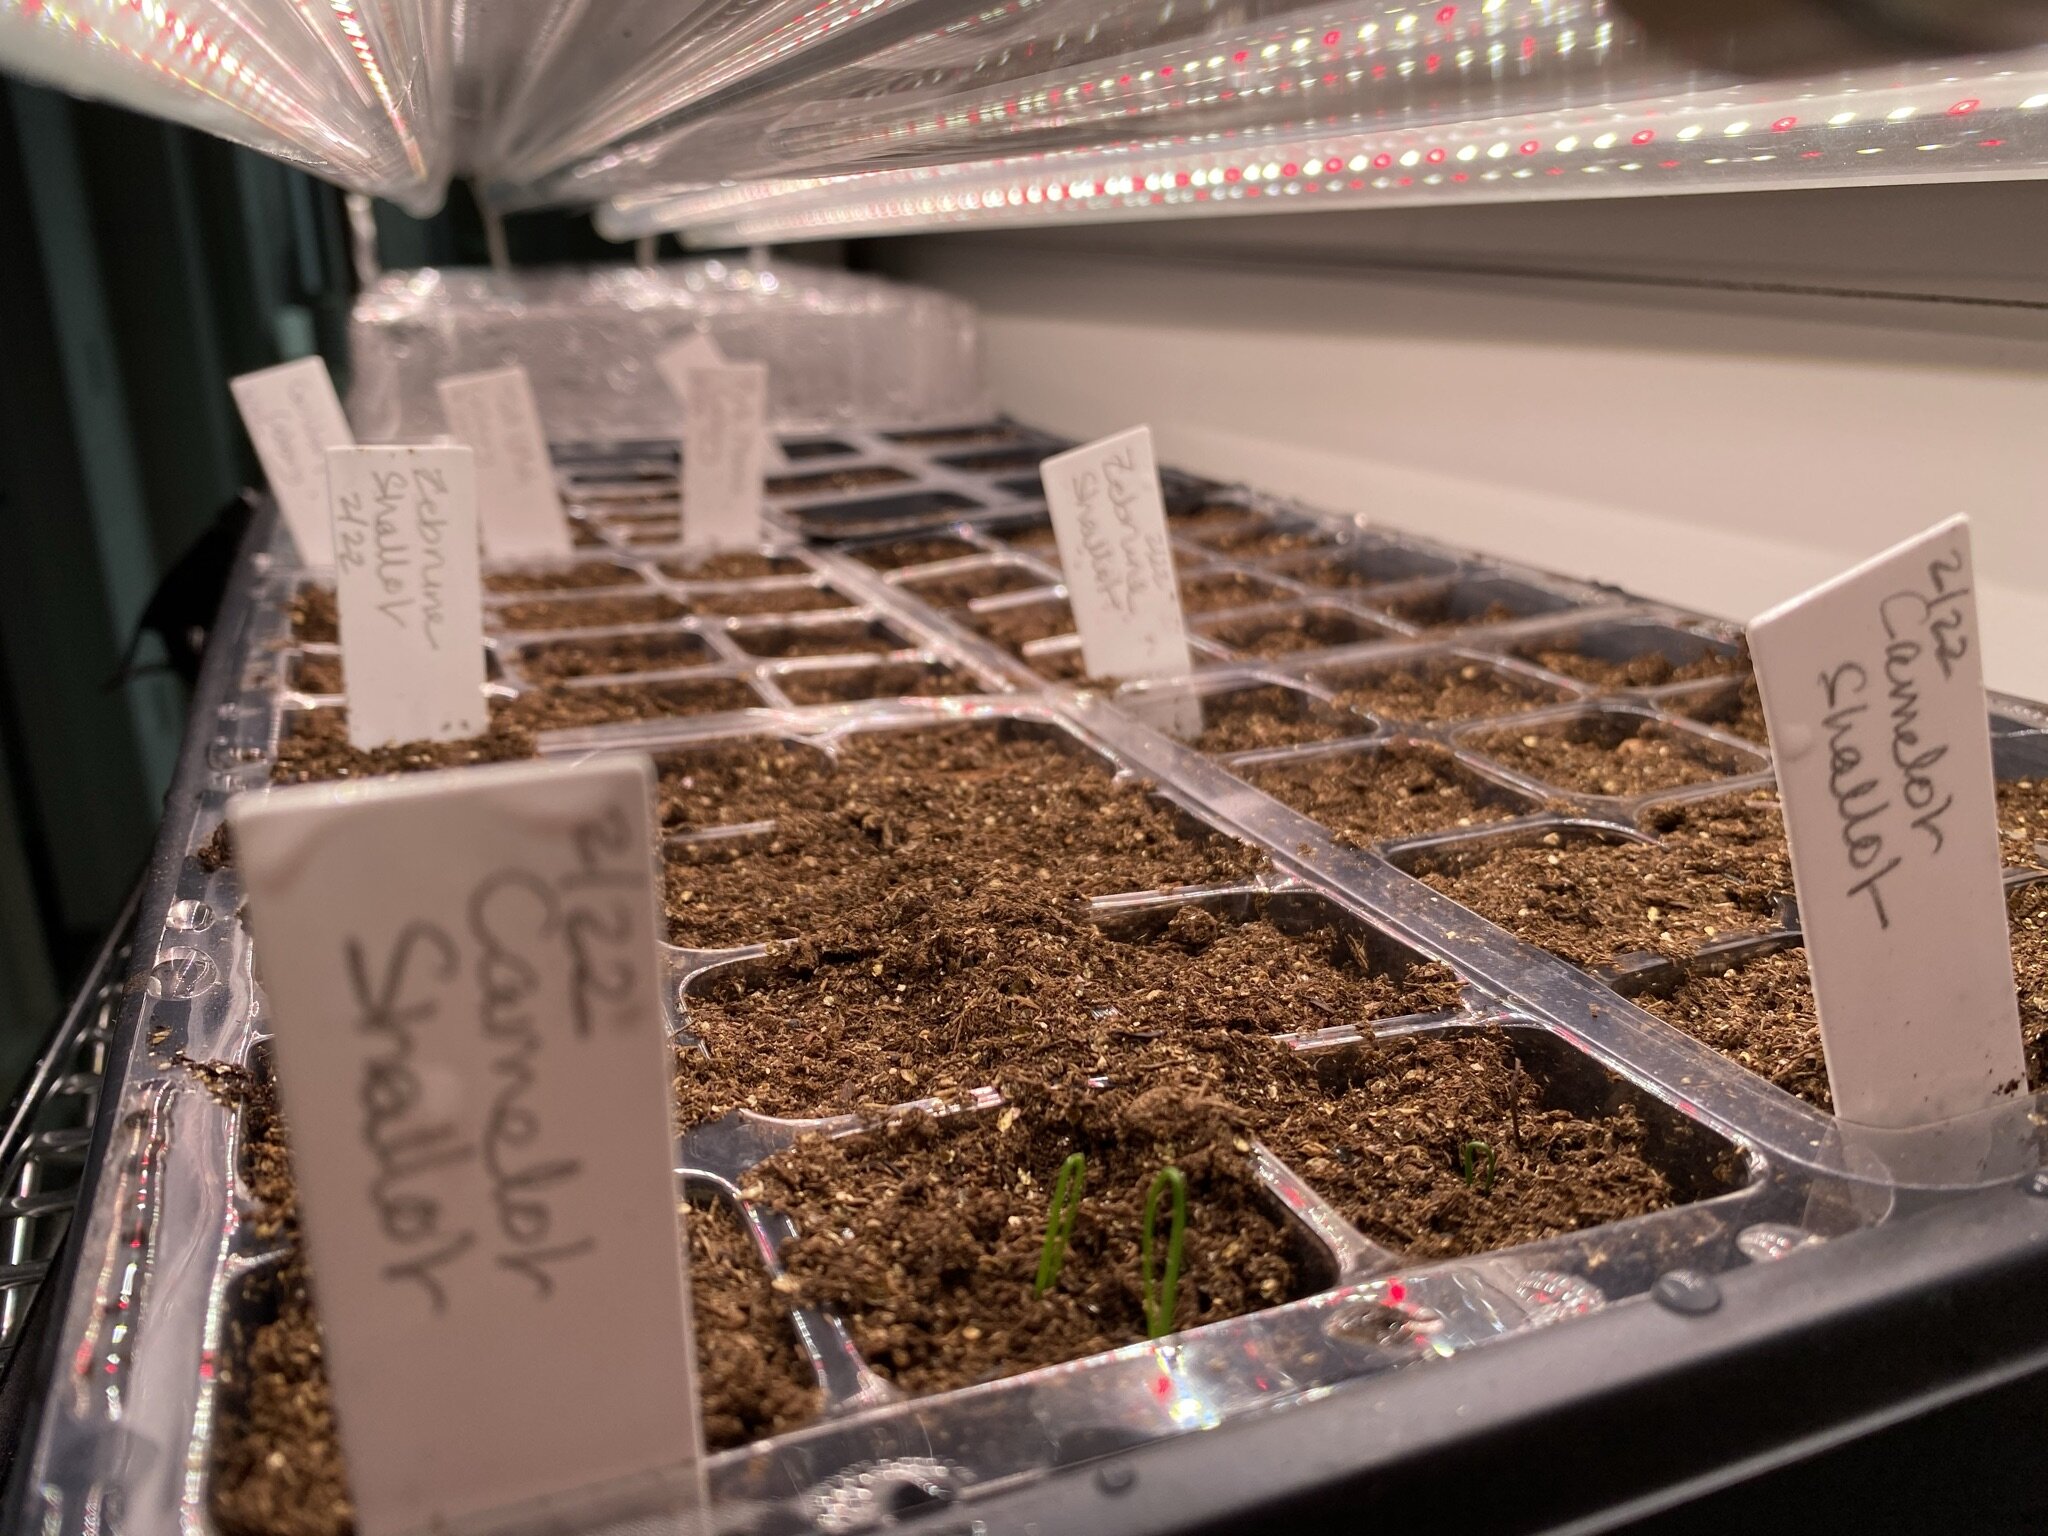
And several weeks ago, gardening season began in earnest when I dragged the wire shelves and LED T-8 shop lights up from the basement, ordered some 10x20 seedling trays to replace those that had cracked at the corners after serving me well for several years, and pulled up my trusty gardening spreadsheet, which I built many years ago to help me get organized at seed starting time.

IMG_6819.jpeg
IMG_6830 (1).jpeg

Over the past two weeks, I have planted the early seeds: celery and perennial herbs (which take a long time to grow), tons of onions of many shapes, sizes and colors, and my cole crops (or Brassicas) – like broccoli and kohlrabi – which get a head start indoors but like to be planted out while the weather is still cool. 

I credit my seedling heat mats for speeding things along this year, because nearly everything has germinated.  Gardening season is off to a great start…

Happy gardening!

#organicgardening #WhyIgarden

Practical Sustainability: Landscape Maintenance for Longevity and Sustainability

As a new homeowner, I’ve been thinking a lot about how to control my cost of home ownership – and making the connection between maintenance and sustainability.  After all, if we can make our possessions last longer by maintaining them in good working order, we will have to replace them less frequently – and that’s better for the environment. 

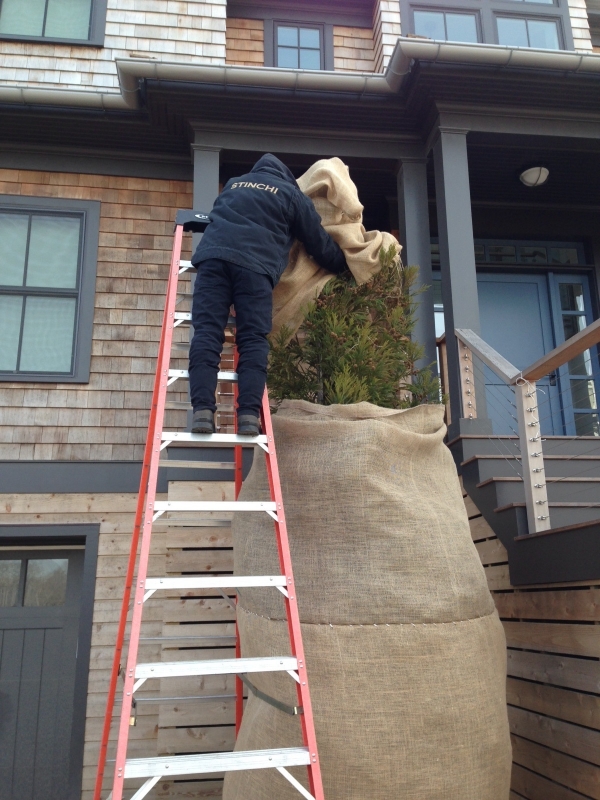
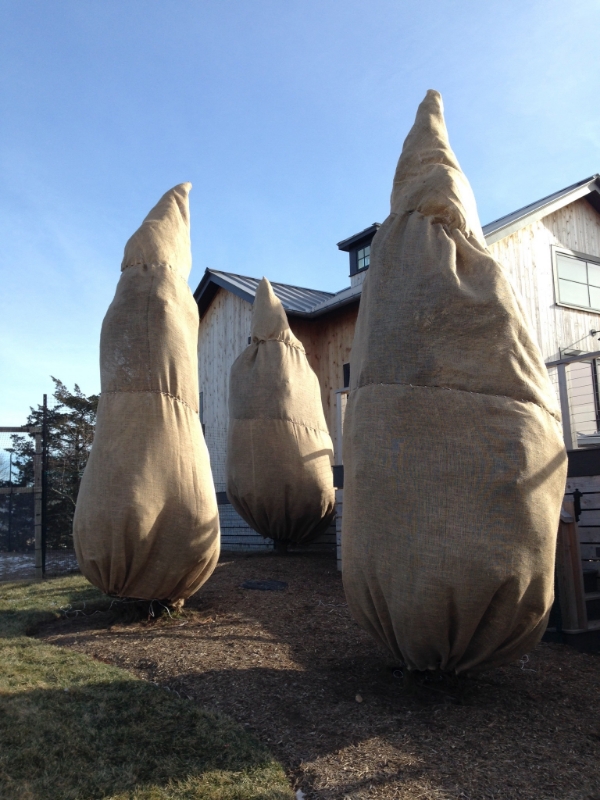
But why am I writing about landscape maintenance in January?  We live in the northeast, which experienced a major snowstorm a week ago.  As the storm was approaching, I called Marcus Stinchi of Stinchi Landscaping and asked what we could do to protect the new trees and plants that had been installed as part of the LEED® Platinum certified Sunset Green Home project. 

Marcus recommended that we:

  • Install tall stakes up the driveway to mark the border between the driveway and the adjacent planting beds to prevent snow plows from accidentally damaging the young plants that are still low to the ground
  • Spray anti-dessicant on broadleaf evergreen trees when the temperature will be above freezing for at least 24 hours.  Organic anti-dessicants provide a protective waxy coating that prevents moisture loss through the leaves and needles during dry, windy and cold winter conditions.  According to Marcus, "Anti-desiccant protects the trees from the harsh winds and salt. Often the 'burning' you see on trees is from them drying out from harsh winds or salt damage from the ocean."
  • Wrap newly planted trees in burlap to protect them from the drying effect of high winds predicted to arrive with the storm.  We may not need to provide this same level of protection once the trees have had a couple of years to establish themselves, but Sunset Green Home has a number of recently planted native evergreen trees.  Protecting them with burlap is akin to purchasing an insurance policy for them. 

The most sustainable strategy for native landscaping is to preserve what is already planted.  Trees and plants need time to become established and can take many years to grow to mature size.  So when harsh winter conditions threaten, it makes sense to give some thought to winter landscape maintenance. 

Now that’s what I call Practical Sustainability!

Practical Sustainability: Grow Your Own!

Monday night was my night to make pickles.  My garden cup runneth over where cucumbers and dill are concerned, and my father-in-law had brought five pounds of beans over to me from his garden.  As I was busy pickling, I started to do some mental math about how much money I was saving and the impact of my gardening activities on the planet.  It all added up to a simple conclusion: gardening saves money and natural resources and – as an added bonus – provides me with the comfort of knowing where my food comes from and what has gone into its production (here’s a hint: just water…no chemicals).

In one evening, I pickled 10 quarts of beans and cukes.  At $8 or $9 per PINT for gourmet pickles in the market, that’s over $150 in pickle value.  And what did it cost to make?  Less than a dollar each for the reusable canning jars, just a few dollars for vinegar and spices, and less than $3 each for packets of organic bean and cucumber seeds.  And our bean and cucumber plants aren't nearly finished producing yet!

Cucumber vines and dill heads in the Sunset Green Home garden

Cucumber vines and dill heads in the Sunset Green Home garden
I can’t help but factor in the environmental impact of having my own organic garden.  I didn’t have to burn any fossil fuel driving to the market to buy my pickles, and no fossil fuels were consumed in transporting the pickles to the store to be sold. 

Even if you don’t have space for a full garden, consider planting an herb garden.  Have you ever traveled to the market, purchased a bunch of parsley or cilantro or dill for a couple of dollars, used a fraction of it and then had to throw it out when it turned into a soupy mess at the bottom of your fridge?  Now consider harvesting just the amount you need from your herb garden.  Nothing goes to waste!  Herbs like sage, tarragon, thyme, chives and rosemary are perennial in my region - so I can plant them once and keep on harvesting year after year!

Sunset Green Home's perennial herb bed

Sunset Green Home's perennial herb bed

I’m looking forward to harvesting some peppers, tomatoes, squash and eggplant this weekend, and snipping a few herbs for a nice ratatouille.  And come Monday, I’ll be pickling another batch of beans and cucumbers – which I’ll put into storage for our family’s enjoyment all winter long. 

Now that’s what I call Practical Sustainability!

Get to Know LEED: Water Efficiency and Sustainable Landscaping

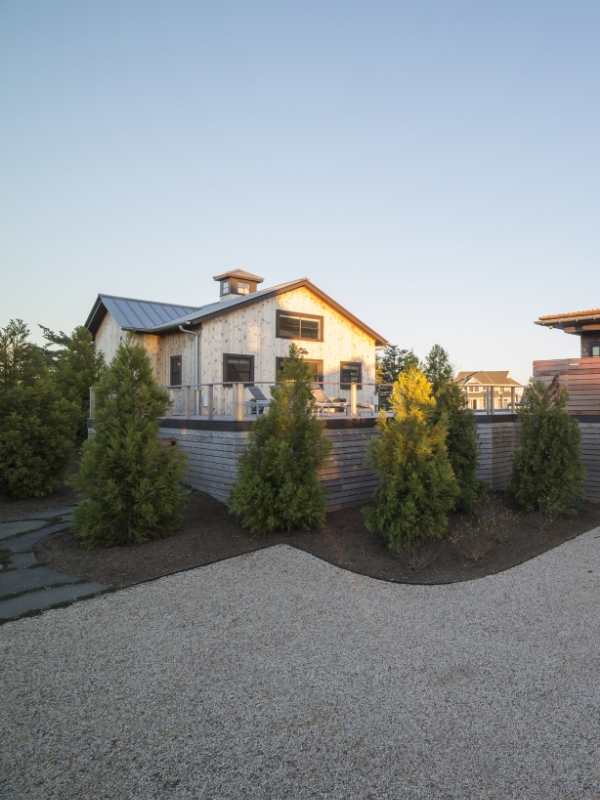
In the next few weeks, you're going to see the Sunset Green Home's landscape take shape.  We have assembled an amazing team of experienced and knowledgeable professionals in the landscaping business, and have selected the highest performing products to make the landscape as sustainable as it is beautiful.

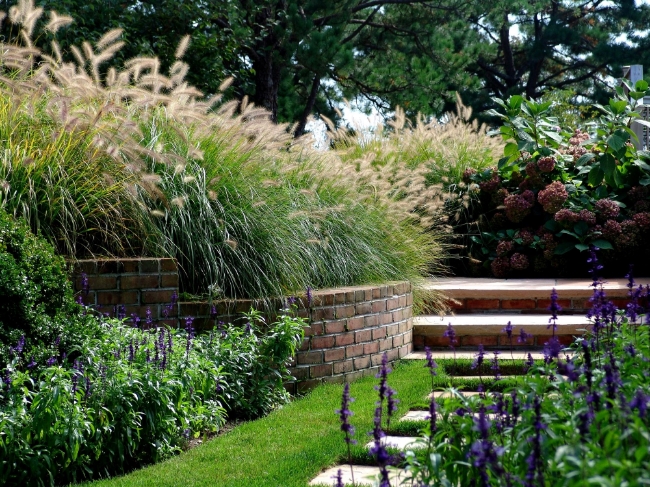
Image: Araiys Design

Image: Araiys Design

It's hard not to notice a beautifully done landscape.  But when we're admiring a well done landscape or garden, most of us don't think enough about whether it was crafted to support a healthy environment.  The LEED® for Homes green building program aims to change that by asking us to address the environmental impact of our landscaping choices.

A project can earn credit toward LEED certification by making irrigation and landscape design choices that support a sustainable site plan.  Here are the specifics:

  • Earn up to four points by installing a rainwater collection and storage system that holds the water from a one-inch rainfall on at least 50% of the roof
  • Earn up to four points by designing and installing a high-efficiency irrigation system and performing a third-party inspection to ensure it is working correctly
  • Earn up to seven points by including "landscape features to avoid invasive species and minimize demand for water and synthetic chemicals" (LEED for Homes Reference Guide)

Getting it right requires a good deal of coordination...which is why Sunset Green Home has assembled a team of irrigation and landscaping professionals with deep experience in the industry, and also in the local environment.

With over 20 years of experience in the region, Marcus Stinchi, of Marcus Stinchi Landscaping, is a true plant expert.  Marcus will incorporate native and adaptive plant material selected for its ability to do well in the variable conditions of the site, which is often windy and occasionally subject to salt-water flooding.  As we approach the plant installation date, Marcus has been working with his wholesale nurseries to identify healthy plant material that will support the landscape design.  "We do a lot of work on the ocean, and with environmentally sensitive seaside buffers.  I like to work with native plants, which are more beautiful than invasive species," Marcus explains.  

Tim Pogue, principal of Resort Lighting, a Hamptons-based irrigation and landscape lighting company, is a LEED Green Associate and is dedicated to supporting sustainable landscaping design with irrigation systems that meet WaterSense requirements and respond to the microclimates where they are installed.  Tim advises, “before designing and installing an irrigation system the local environment, soil, plant type and water source all need to be reviewed. LEED projects provide a gateway for success in water use, conservation and efficiency."

Even the best designers and installers need quality products and materials to make their work a success.  That's why Sunset Green Home reached out to a handful of important suppliers.  

Rhizomatous Tall Fescue is engineered to provide a deep, strong rooting system that quickly becomes established. This deep rooting means less watering is required as the grass plants derive their moisture from lower in the rootzone. As temperatures climb into the summer season, the sod will stay green and lush with less water. It also exhibits a self-repairing capability because of the rhizome it creates, where new shoots are formed underground and then develop into new grass plants. There is technology in turf, and RTF sod is on the forefront.
— Scott Geiser, DeLea Sod Farms
Rhizomatous Tall Fescue

Rhizomatous Tall Fescue

LEED rewards projects that limit the use of conventional turf (i.e., lawn), and Sunset Green Home has designed a lawn comprising less than 60% of the home’s designed landscape – which enables the project to earn one point toward LEED certification.  For several reasons, our team made the choice to install sod rather than seed the lawn:

  • Grass seed is best planted in the fall.  However, autumn is also hurricane season, and Sunset Green Home is particularly sensitive to the adverse effects of strong storms.  We believe installing sod in the spring and giving it time to take root before storm season will be the best way to protect the site against storm erosion.
  • But we couldn't have made the decision to install sod had DeLea Sod Farms, one of the Hamptons' premier sod farms, not recommended its Rhizomatous Tall Fescue (RTF) sod, a LEED compliant drought tolerant variety whose root system grows deeper than that of conventional turf varieties.  DeLea Sod's Scott Geiser comments, "Rhizomatous Tall Fescue is engineered to provide a deep, strong rooting system that quickly becomes established. This deep rooting means less watering is required as the grass plants derive their moisture from lower in the rootzone.  As temperatures climb into the summer season, the sod will stay green and lush with less water. It also exhibits a self-repairing capability because of the rhizome it creates, where new shoots are formed underground and then develop into new grass plants. There is technology in turf, and RTF sod is on the forefront."
  • Finally, it has been nearly three years since Hurricane Sandy set off the events that brought about the Sunset Green Home project.  Frankly, we're eager to see the site finished.  Installing sod gets us that much closer to the finish line!
Poly-Mart's 1,000 gallon Rainwater Harvesting Tank

Poly-Mart's 1,000 gallon Rainwater Harvesting Tank

Creating the Sunset Green Home landscape will require the installation of hundreds of individual plants.  And, even though we have selected the majority of those plants for their drought tolerance, we're still going to need supplemental water to keep them healthy.  It doesn't make sense to irrigate a landscape with municipal water that has gone through resource-intensive purification.  According to Sean Bravo of Poly-Mart, this is particularly true in a region that receives abundant rainfall and where a rainwater harvesting system becomes cost effective.  So, we are installing a rainwater harvesting system that features Poly-Mart's 1,000 gallon rainwater cistern as the centerpiece. 

ATAS Aluminum Roof on Sunset Green Home

ATAS Aluminum Roof on Sunset Green Home

Sunset Green Home will capture rainwater from the standing seam ATAS aluminum roof of the pool house, an ideal surface for rainwater capture according to several recent studies.  A 2011 study published in the journal “Water Research” concluded that water captured from metal roofs has lower levels of dissolved carbon and carries less bacteria (e.g., coliform) than water collected from other roofing surfaces.  But that's not the only advantage of an aluminum roof.  Chris Kroeter is a LEED Green Associate and Product Representative for ATAS International, Inc.  As Chris explains, “In addition to its rainwater harvesting properties, metal roofing contributes to a sustainable building with its durability, longevity and recycled content.  The ‘cool roof’ pigments that are used in the paint finish of metal roofing offer higher solar reflectance values, which results in a building’s increased energy efficiency.”

Hunter Irrigation Controller

Hunter Irrigation Controller

To deliver water to the plants, we will be using Hunter Industries’ WaterSense labeled irrigation system.  Featuring the Solar Sync ET and Rain-Clik components that read actual rainfall, temperature and other site conditions, the system will adjust itself to the specific microclimate of the Sunset Green Home site.

The final element of Sunset Green Home's irrigation system is the EZ-FLO automatic fertilizing system, which will allow us to use micro-dosing of organic fertilizers and compost teas.  The benefits of "fertigation" include:

  • Enhanced control over nutrient application
  • Nutrient application timed to coincide with ideal plant growth stage
  • Lower risk of environmental damage from leaching and runoff
EZ-FLO Injection Tank

EZ-FLO Injection Tank

In fact, we will use two EZ-FLO systems - one for the vegetable garden and one for the lawn and ornamental plantings.  EZ-FLO's National Sales Manager, Darin Brasch, explains his company's involvement in the Sunset Green Home project: "Environmental stewardship is paramount for the continued growth and success of the irrigation and green industry. EZ-FLO is proud to be a selected partner for the Sunset Green Home project. Projects such as this will only further the industry’s and public’s awareness of sustainable landscaping practices."  Click here for more information about Fertigation.

Check back with us over the comings weeks as our landscape solution is installed.  We can't wait to see the beauty that a sustainable landscape contributes to Sunset Green Home.

House Tours: A Passive House in the Heart of NYC

Walk through the streets of New York City, and youre immediately aware of the ethnic and cultural diversity of its people.  Then look up – and study the buildings.  Youll see the same sort of diversity in the citys housing stock.  From 19th century tenement buildings to 21st century steel and glass towers, from single-family homes to high-rise apartment buildings, New York City has it all!  But, despite their apparent diversity, what most of these homes have in common is their lack of energy efficiency and environmental mindfulness.   

But that seems to be changing.  Around New York City, we are seeing residential buildings being built or renovated according to green building standards.  I recently had the opportunity to tour the first "row house" home built to Passive House standards in the borough of Queens.

Because the Sunset Green Home project is registered under the LEED® for Homes program, I generally write about LEED projects.  So what is the difference between LEED and Passive House?

Façade of the Climate Change Row House

Façade of the Climate Change Row House

Both LEED and Passive House (which is also known as Passivhaus, as it originated in Germany) comprise a body of standards for sustainable building.  In the case of LEED for Homes, the standards address many categories in addition to energy efficiency, including – among others – indoor air quality, the projects location and links to its surrounding community, materials and resources used in its construction, and education of the homeowner.  Passive House is a narrower set of standards that focuses primarily on energy efficiency, and seeks to minimize energy demand, heating and cooling requirements, and envelope tightness (air leakage).  Passive House requires more of a project than LEED in terms of energy efficiency; LEED requires more of a project in terms of other important sustainability categories.

Google the two terms and youll find a lot of people opining on which of the two is “better.”  Although I am a LEED AP Homes (credentialed by the Green Building Certification Institute), I dont have a dog in this fight!  I applaud anyone who voluntarily elects to participate in either one of the programs (emphasis on “voluntarily”…since current building codes are considerably less stringent than either of these two standards). 

Back to the “Climate Change Row House” (so named by its owner, architect Thomas Paino) – the first multifamily row house home built to Passive House standards in Queens.  Sunset Green Home and the Climate Change Row House have one thing in common: Flood zone requirements had a profound influence on both projects.  Although Painos home was not flooded by Superstorm Sandy, which blew through New York City in October 2012, its living spaces needed to be elevated nearly four feet in order to comply with current flood zone requirements.  Conventional house lifting doesnt work when you have side walls in common with your neighbors.  So Paino, an architect who has worked for two decades in sustainable architecture, got creative.  He redesigned the home by raising each of the floors and keeping the walls intact.  The façade was completely rebricked (the house had undergone a 1970s renovation and had a featureless white brick façade when Paino purchased it; while some have dubbed the Climate Change Row House one of the ugliest in Queens, its current façade is a vast improvement over what Paino started with). 

The Climate Change Row House boasts a host of design features that make it one of the most energy efficient homes in the city.

Triple pane Schüco windows not only combat heat gain and loss through the building’s envelope, but they also provide extraordinary sound insulation.  On my tour of the house, I was completely unaware of outside noise.

Triple pane Schuco windows with Argon gas for superior insulation

Triple pane Schuco windows with Argon gas for superior insulation

Passive House homes have minimal penetrations to the outside.  So Paino's kitchen has a Best by Broan range hood that does not exhaust to the outdoors, but that instead uses two recirculating charcoal filters to eliminate cooking smoke and odors. And because Passive Homes do not have combustion appliances - so a fireplace and gas range were excluded - the kitchen features an induction cooktop by Bosch. 

Bosch induction cooktop with Best by Broan recirculating range hood above

Bosch induction cooktop with Best by Broan recirculating range hood above

Passive Homes are so well insulated and sealed that they do not require much in terms of heating and cooling systems.  All of the mechanical equipment for the Climate Change Row House fits into a small closet on the main floor, and includes a Heat Recovery Ventilator (HRV), which exhausts stale air and feeds preconditioned air into the house. 

HRV exhausts stale air to the outside and provides fresh air to the indoor environment

HRV exhausts stale air to the outside and provides fresh air to the indoor environment

A small Mitsubishi heat pump system is on hand if supplemental heat and cooling are required.

Mitsubishi heat pumps provide supplemental heating and cooling capacity

Mitsubishi heat pumps provide supplemental heating and cooling capacity

Paino cautions that "when you seal up a house, you have to be very aware of materials" to make sure that they don't "offgas" toxins into the indoor environment - particularly important given the tightness of the building envelope (click here to read my earlier article on the impact of 21st century building practices on indoor air quality).  MDF doors from TruStile contain no added urea-formaldehyde resins.  Paints contain no volatile organic compounds (VOCs), and the handsome wormy maple floor was finished on site using a UV sealing technology that creates a durable surface without any harmful offgassing chemicals.

TruStile NAUF MDF doors painted with no VOC paints in colors inspired by a western evening sky

TruStile NAUF MDF doors painted with no VOC paints in colors inspired by a western evening sky

The Climate Change Row House also collects rainwater from 50% of the roof into a cistern that was designed especially for urban homes.  Paino uses the water to irrigate a sizable vegetable garden that he has planted in the double backyard formed by the home and an adjacent brownstone building that Paino also owns (and rents out to a tenant).  He starts seedlings in the home's rooftop greenhouse.  By growing produce on site from seed and irrigating with harvested rainwater, Paino reduces his household's consumption of fresh vegetables that must often travel great distances to reach the New York City market.

A rainwater harvesting system collects rainwater from 50% of the roof to water the home's sizable vegetable garden

A rainwater harvesting system collects rainwater from 50% of the roof to water the home's sizable vegetable garden

A “Green Roof” garden, planted with several varieties of sedum, serves as a layer of insulation that keeps the rooms below it cooler in the summer than if the house were built with a conventional roof.  The roof garden also absorbs rainwater, which means less stormwater runoff into the citys already overburdened sewers.  According to the New York State Department of Environmental Conservation, “In addition to being cited as a major source in one-third of all impaired waters, urban/stormwater runoff is noted as a major source of contaminants in 36% of all waters that experience lesser, but measurable, minor impacts to water quality, and a contributing source in nearly half (47%) of waters with minor impacts.”  Painos design is an example of how urban dwellers can work to protect local waterways. 

Six varieties of sedum comprise the home's green roof garden

Six varieties of sedum comprise the home's green roof garden

Also on the roof is a solar thermal panel that generates the majority of the home’s hot water.

Solar thermal collector on the roof and hot water tank in the greenhouse below

Solar thermal collector on the roof and hot water tank in the greenhouse below

Not only is the green roof attractive, but sitting on Paino's roof deck, one has a spectacular view of Manhattan just across the river.

Evening view from the roof of the Climate Change Row House

Evening view from the roof of the Climate Change Row House

Because of the extent of the changes Paino needed to implement in order to conform with the flood codes, the City of New York designated Painos house as "new construction" rather than a renovation.  The result of this designation?  Paino told me that his ultra-efficient home would no longer be a candidate for Passive House certification by the Passive House Institute US (because the existing brick side walls would be maintained, Paino had originally designed the home to meet EnerPHit, Passive House Institute's renovation standard, which recognizes the challenges of refurbishing an existing structure and it less stringent in terms of envelope leakage).  But that doesn't matter.  The Climate Change Row House is still a superb example of how urban homes can be constructed for energy efficiency and minimal environmental impact.

*                *                *                *                *

Want to learn more?  The New York Times scooped me on this story!  Here's what they wrote: "Easy on the Environment, but Not Necessarily the Eyes" (August 18, 2014)


Early Spring Salad in a Jar – Grow Your Own!

Spring is in the air!  Today was a picture perfect day for gardening and I spent the morning planting radishes, spinach, arugula, peas and several other early spring crops.  In just a few weeks, we’ll be eating salad that we grew ourselves.  After our seemingly endless northeast winter, I’m really looking forward to the rebirth of my garden.

I had dinner a couple of weeks ago with my friends Taryn and Lisa.  Taryn had just returned from vacation where she had been served a salad in a canning jar.  I love that idea!  Jars are reusable and travel well.  No plastic containers to discard.  And, since I’m a fanatical canner, I have tons of empty jars taking up space in every drawer and cabinet in my kitchen (from last year’s pickles, chutneys, sauces…which we used throughout the winter).  So, I figured I’d give salad-in-a-jar a try…

I remembered that my favorite canning site, Food in Jars, had written a post about a handy insert that separates a canning jar into compartments, so I ordered one from Amazon figuring that I could use it to hold the salad dressing.  Here’s my early spring salad – in a regular wide-mouth Ball jar and with the dressing in a Cuppow BNTO lid insert.

The only thing better than this will be when the salad and veggies come from my own garden!  Just a few more weeks to wait.

Happy gardening and happy eating!

Spring salad in a canning jar, with a Cuppow BNTO insert to separate the salad and dressing.

Spring salad in a canning jar, with a Cuppow BNTO insert to separate the salad and dressing.


Back by Popular Demand - DIY Raised Garden Beds!


Click on the image above for Rasied Bed Corners from Gardeners.com


Click on the image above for Aquacorners from Gardeners.com


Many of you have reached out to me about building raised garden beds this summer.  After our seemingly endless winter, the sun is shining today and our temperature should top 60 degrees.  It's really time to start gardening! 

I swear by the method of dense companion planting in raised beds (read Sally Jean Cunningham's Great Garden Companions - it's my "go to" gardening bible).  Planting your crops close together, with herbs and flowers interspersed amongst them, will eliminate the empty spaces where weeds might take root.  And if you line your beds with "hardware cloth" (1/2" wire mesh that you can find at Home Depot or Lowe's), the burrowing critters won't be able to find their way to your crops.  Most importantly, raised beds will save your back when you're tending the garden!

Original raised bed on the right; expansion materials and new bed half completed at center.

Original raised bed on the right; expansion materials and new bed half completed at center.

I've built two types of raised beds and they're both attractive and durable.  The first type - which is less costly, but more labor intensive (perfect for experienced DIY-ers) - was described in detail in an earlier post

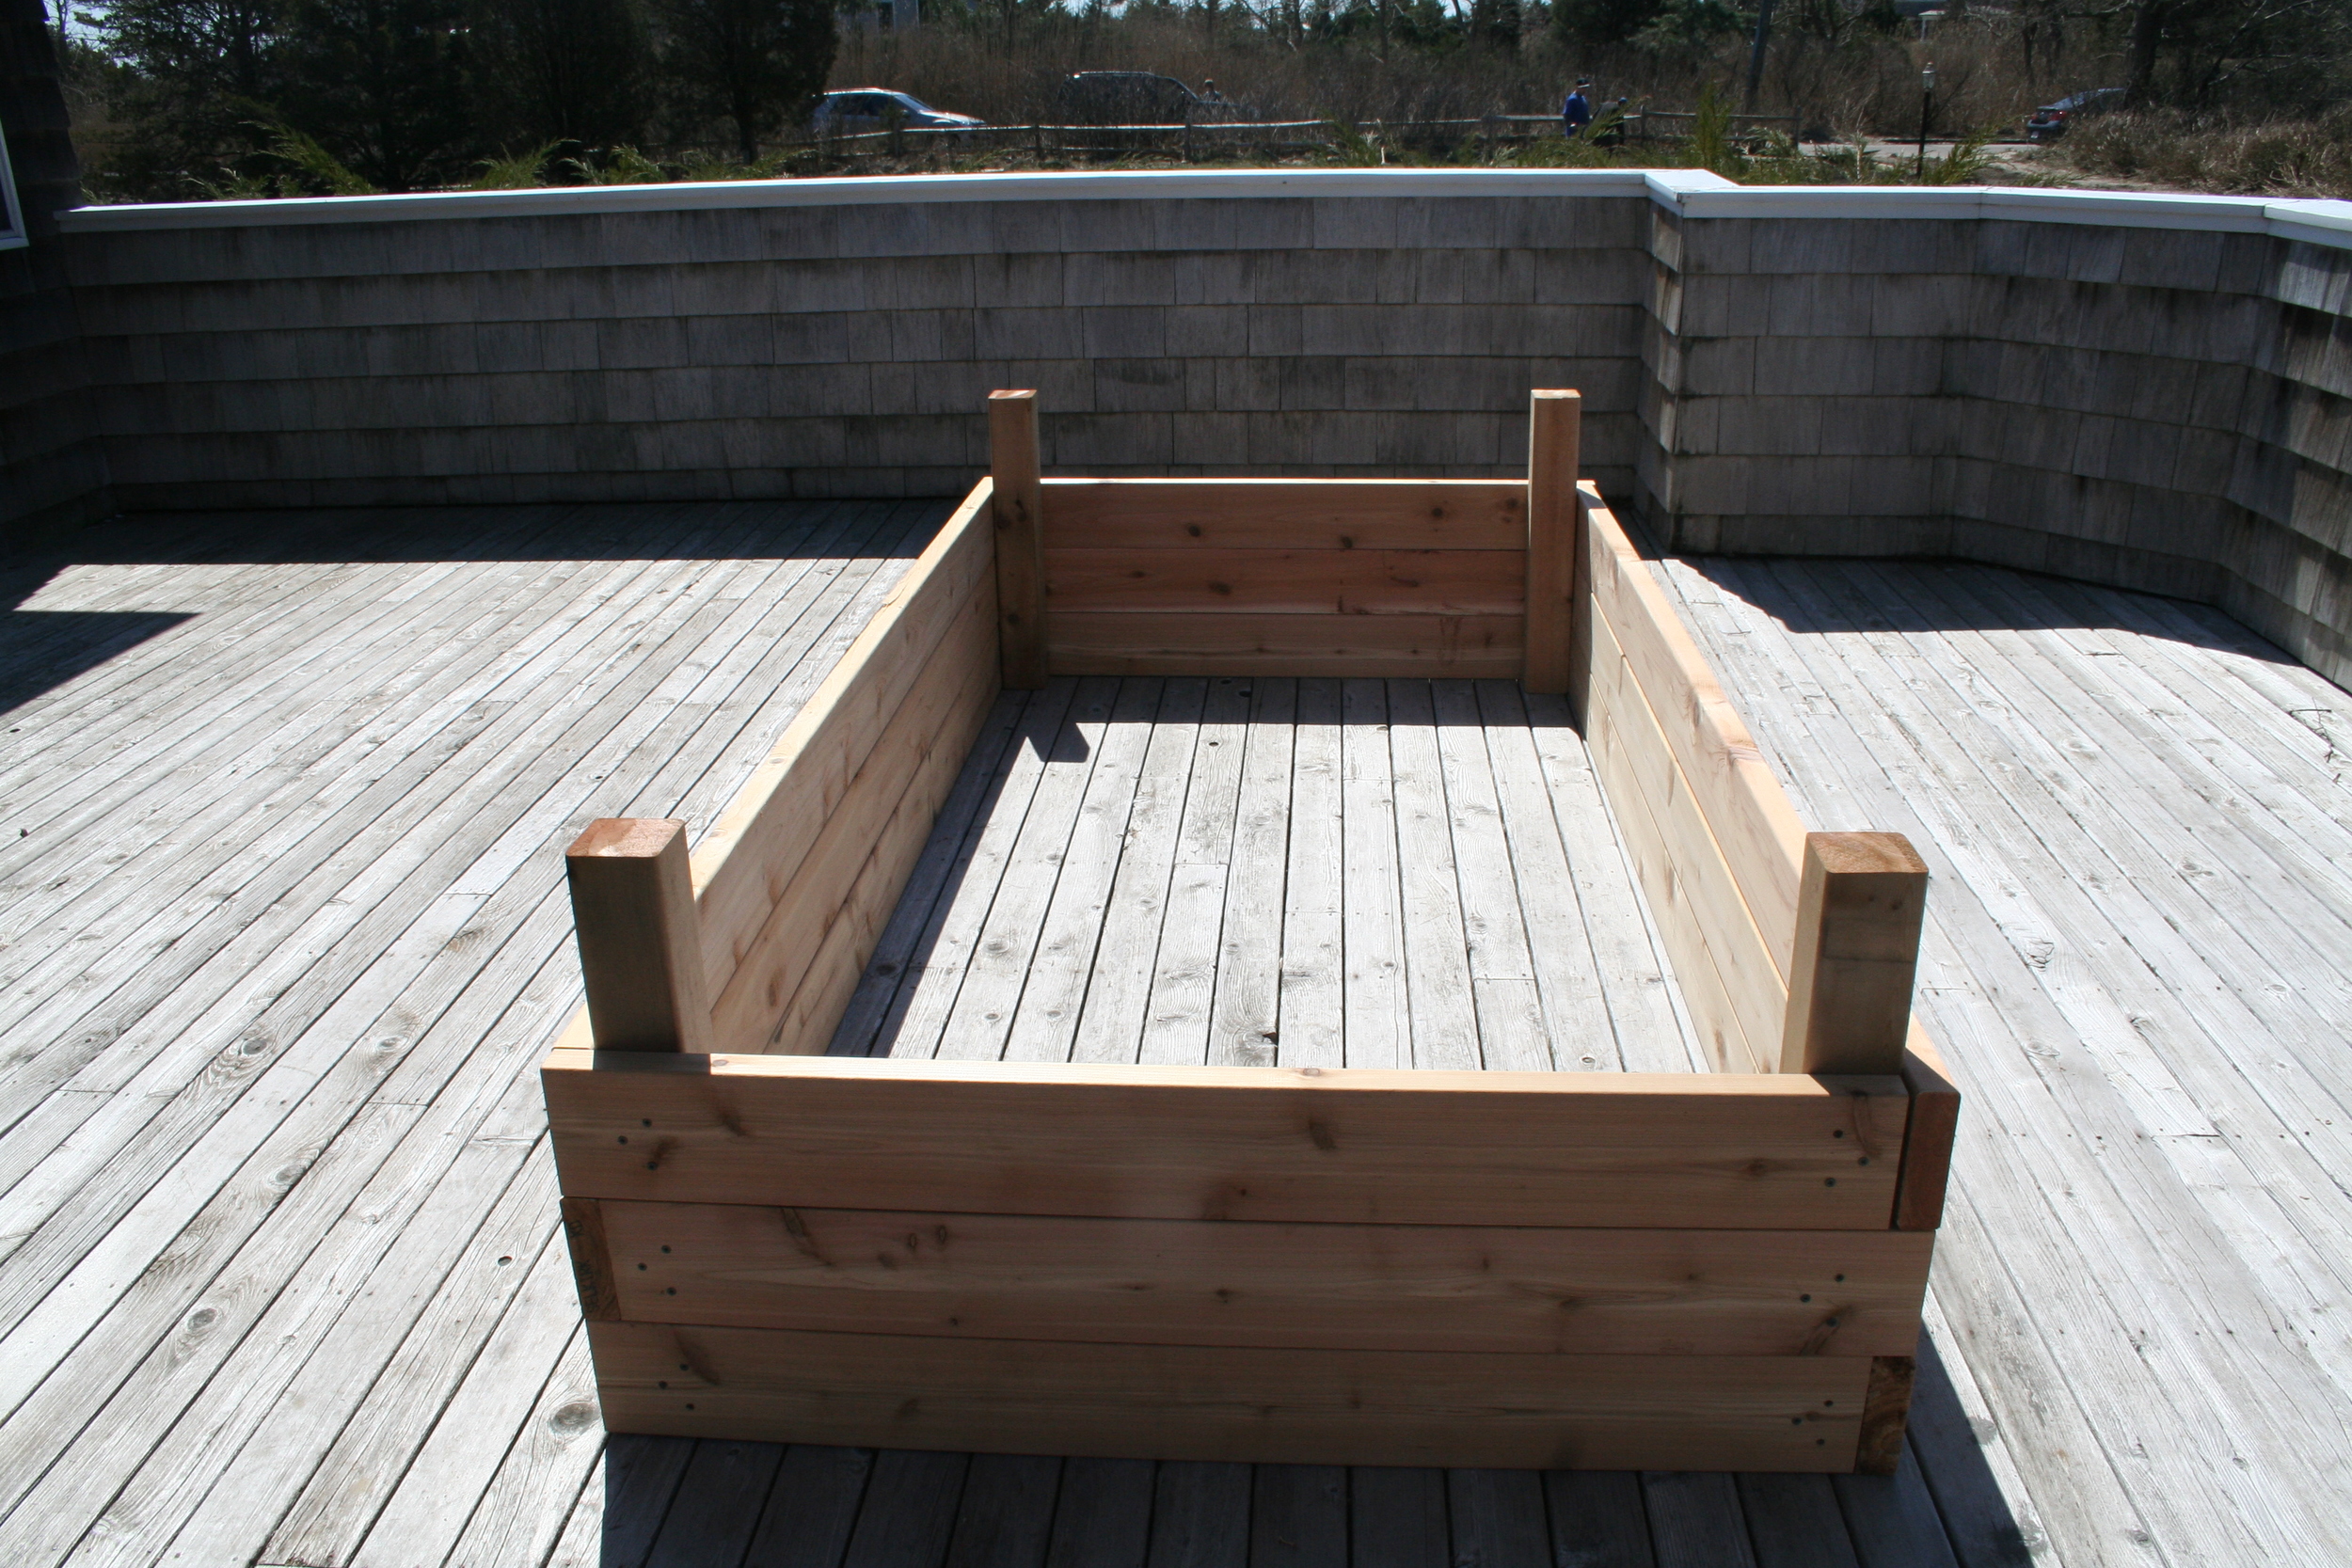
The second type uses Raised Bed Corners and In-Line Connectors from Gardener's Supply Company and assembles in minutes. For a 12" high bed, all you need are the 12" raised bed corners and two rows of 2x6 lumber (see photo above of our expansion, half completed, with one row of 2x6 lumber already in place). Size possibilities are endless and you can even create beds that have sections of varying heights. Just make sure to purchase lumber that corresponds to the size of the corners and connectors that you intend to use. Include the in-line connectors if you plan to construct beds that are longer than 8 feet.

I used untreated cedar, but the National Gardening Association says that new ACQ pressure treated lumber is safe for vegetable gardens too.  My local lumberyard, Speonk Lumber, cut the cedar boards for me so that all I needed to do was slip each board into the slots in the raised bed corners and insert a screw to hold it all together.

Once I assembled my garden beds, I combined equal amounts of organic topsoil and compost from my local garden center (ordered for my initial beds by the cubic yard, which is far less expensive than purchasing by the bag), along with some peat, and shoveled everything into the beds.  To figure out how much soil mix I needed, I multiplied together the length, width and height of my bed in feet, and then divided by 27 to obtain the number of cubic yards of soil mix.  For my first beds, which were 18" high and 4' wide by 8' long, I needed (1.5 x 4 x 8) / 27 = 1.8 cubic yards of soil mix.

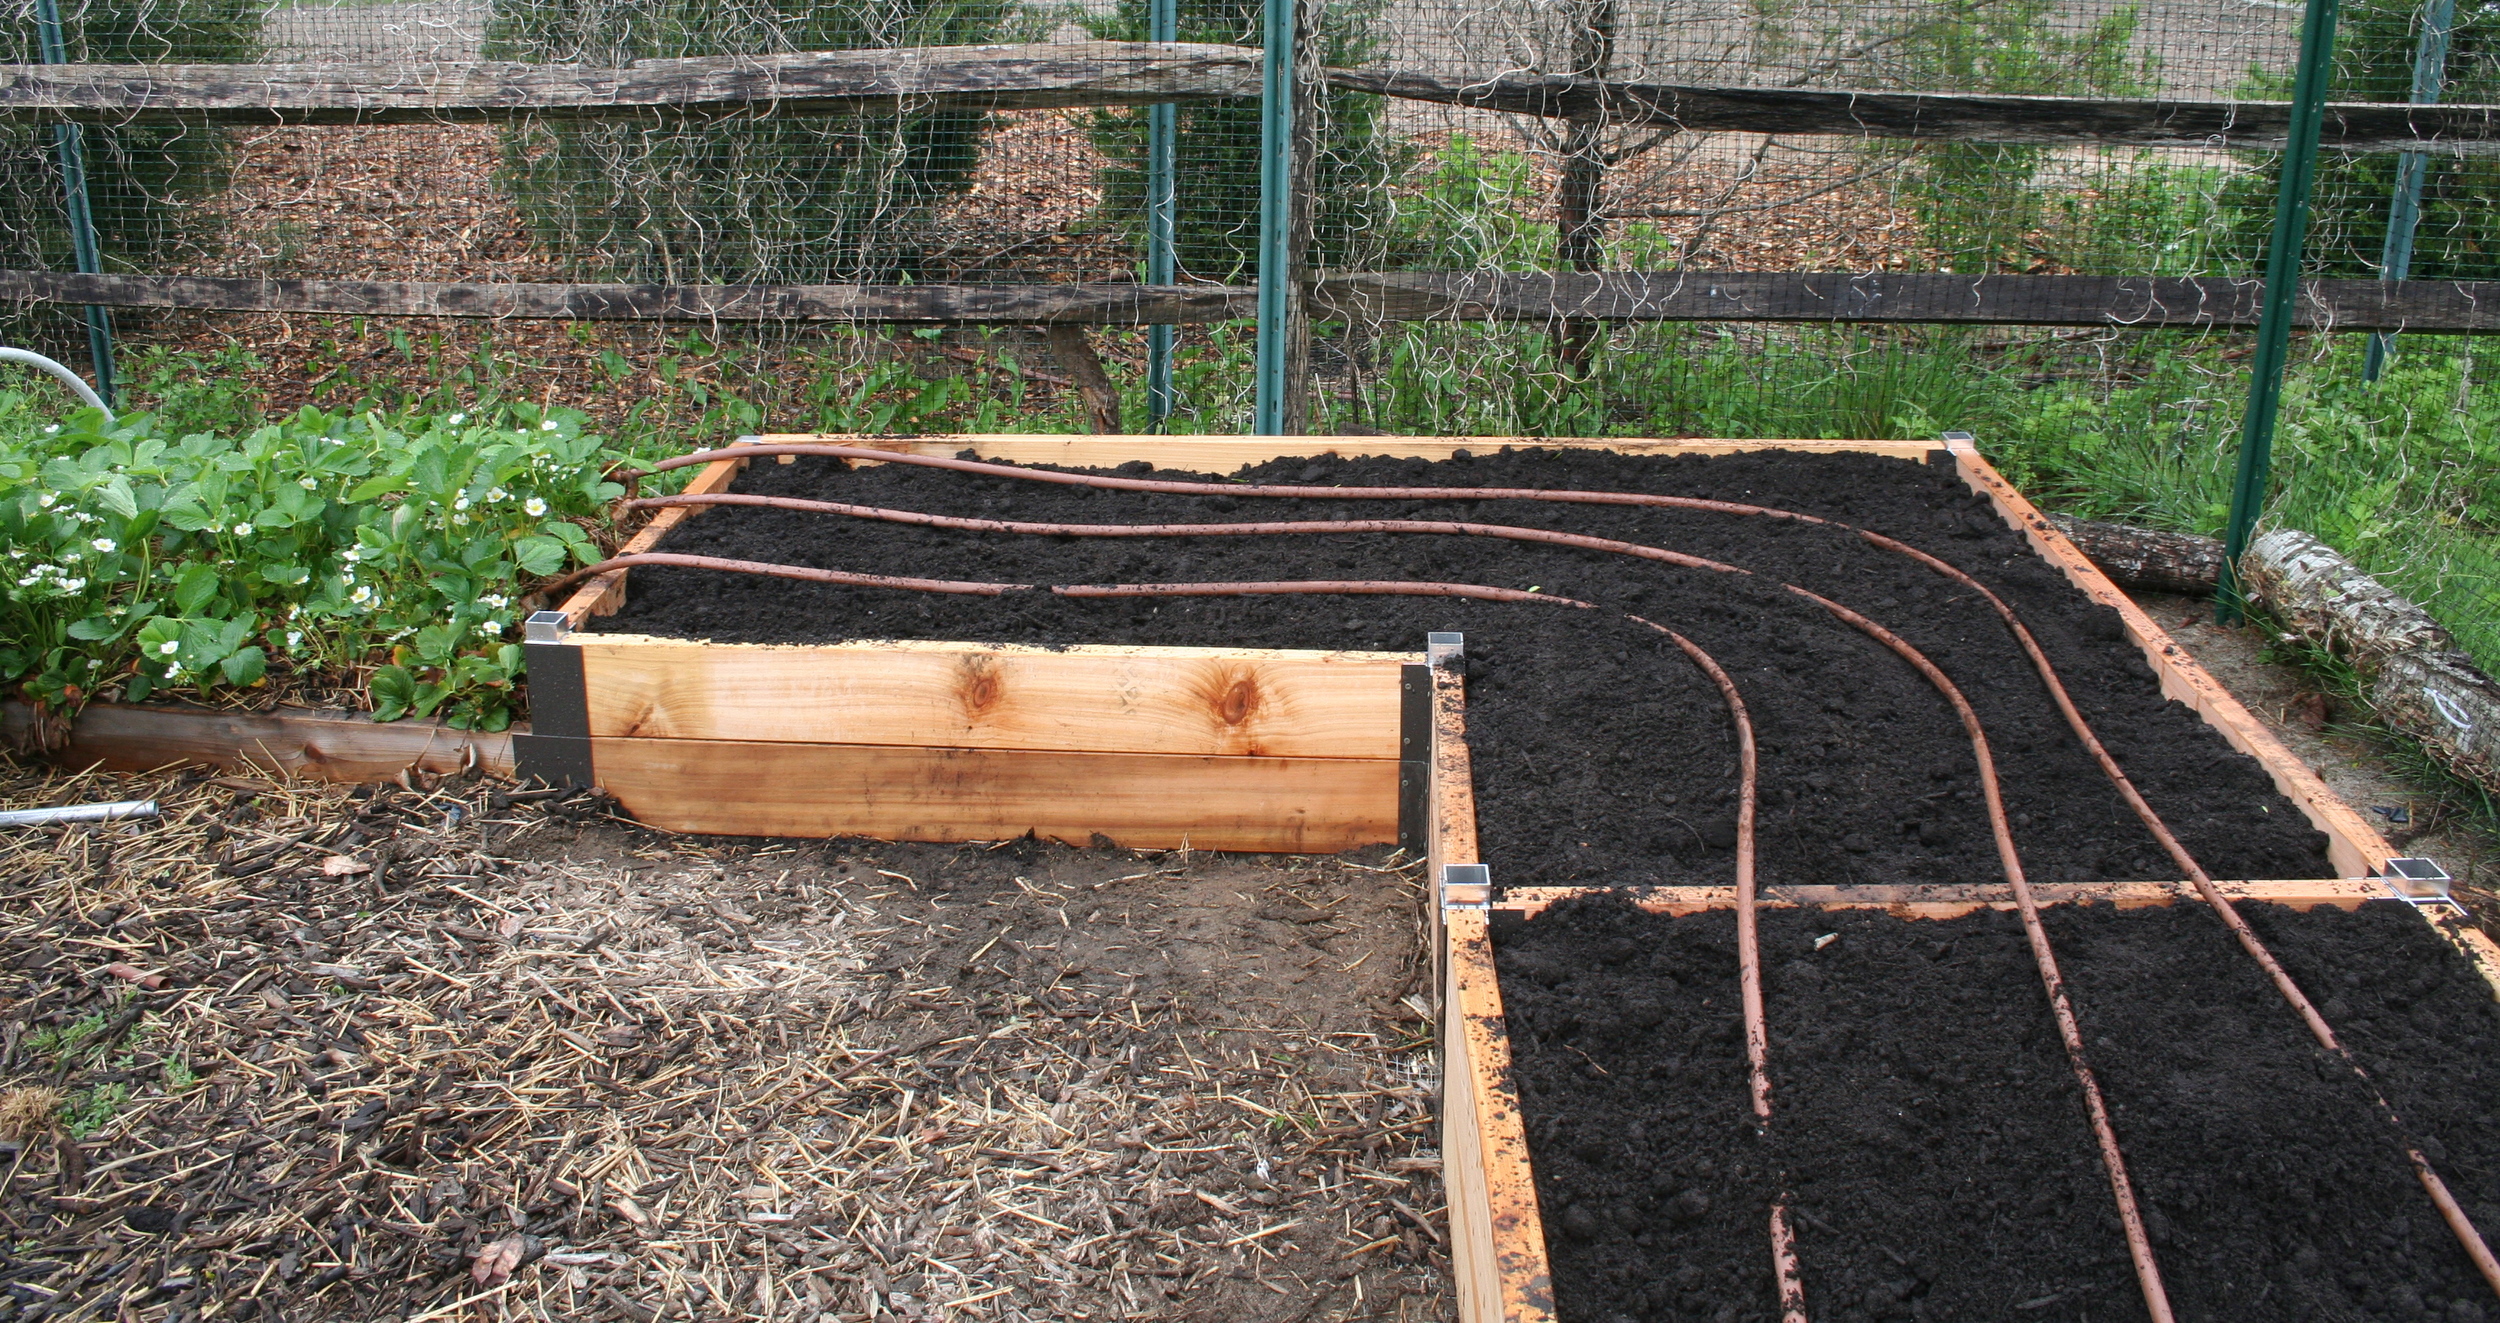
The only thing I had left to do was add water and seeds.  Providing a regular supply of water to your garden beds is critical.  In my 4' wide beds, I have three parallel lengths of drip hose running down each bed to ensure that every plant in the bed has access to an adequate water supply (see photo).  My irrigation operates on a timer, and I water before sunrise each day to ensure that the water goes directly to my plants' roots and doesn't evaporate in the heat of the day. Gardeners.com sells Aquacorners and DIY drip systems.  Although I didn't use them in my garden beds, they are well-reviewed on the Gardeners.com web site.

Expansion complete!  Soil and irrigation in place...all we need now are seeds and water.

Expansion complete!  Soil and irrigation in place...all we need now are seeds and water.

Rome wasn't built in a day.  But my garden beds were.  If you've been thinking about starting a garden, now's the time.  In the northeast, where I live, it's time to plant peas, lettuces, spinach, radishes and a host of other cool weather crops.  I'll have my hands in the dirt this weekend.  What are you waiting for? 

Leave a Comment!  Tell us about your Raised Garden Beds.

LEED for Homes Says to Grow Green. We Agree!

A food garden – and a LEED point – for the Sunset Green Home.  That’s a point we wouldn’t consider leaving “on the table.”  According to the LEED for Homes green building program, the intent of the Food Garden credit is “to provide a functional and sustainable means of supporting the homeowner’s food needs.” LEED for Homes awards one point under the Innovation in Design credit category to projects that install a garden of at least 200 square feet. 

Sunset Green Home Raised Bed Garden.JPG

I’m an avid gardener.  And my garden has been organic since we built it shortly after purchasing our home.  We constructed several untreated cedar raised beds (see my earlier blog post to learn how to build your own) and began gardening right away.  My garden, with 12 distinct planting areas (four of which are occupied by perennial asparagus and strawberry crops), tops out at about 200 square feet of productive, easy-to-access raised planting beds. 

Sally Jean Cunningham’s Great Garden Companions has been my gardening bible since Day One – and I’ve given away countless copies of it to friends and family.  With beautiful photographs and useful graphics, Great Garden Companions offers a blueprint for setting up and managing a pesticide-free organic garden. 

What’s the secret?  Planting “neighborhoods” of vegetables, herbs and flowers that either attract beneficial insects or deter and confuse the more harmful insects (the herbs and flowers do double duty by crowding out unwanted weeds as well). Coupled with annual crop rotation (which was my “excuse” for adding more beds during my garden’s second year), the companion planting method has worked well for me. 

Sunset Green Home Garden.JPG

Until Hurricane Sandy walloped my garden, I was able to grow nearly all of the produce to feed my family of five from May until October – with an abundance of “extras” that I turn into pickles, chutneys, ketchup and sauce that we can eat through the winter. 

Sunset Green Home Garden - Cabbages and Herbs.JPG

We have asparagus, lettuce, spinach and radishes in May and June; peas and strawberries in early summer; onions, cucumbers and beans throughout the summer; carrots, tomatoes, squash and peppers in late summer…and so much more that I don’t have space to list! 

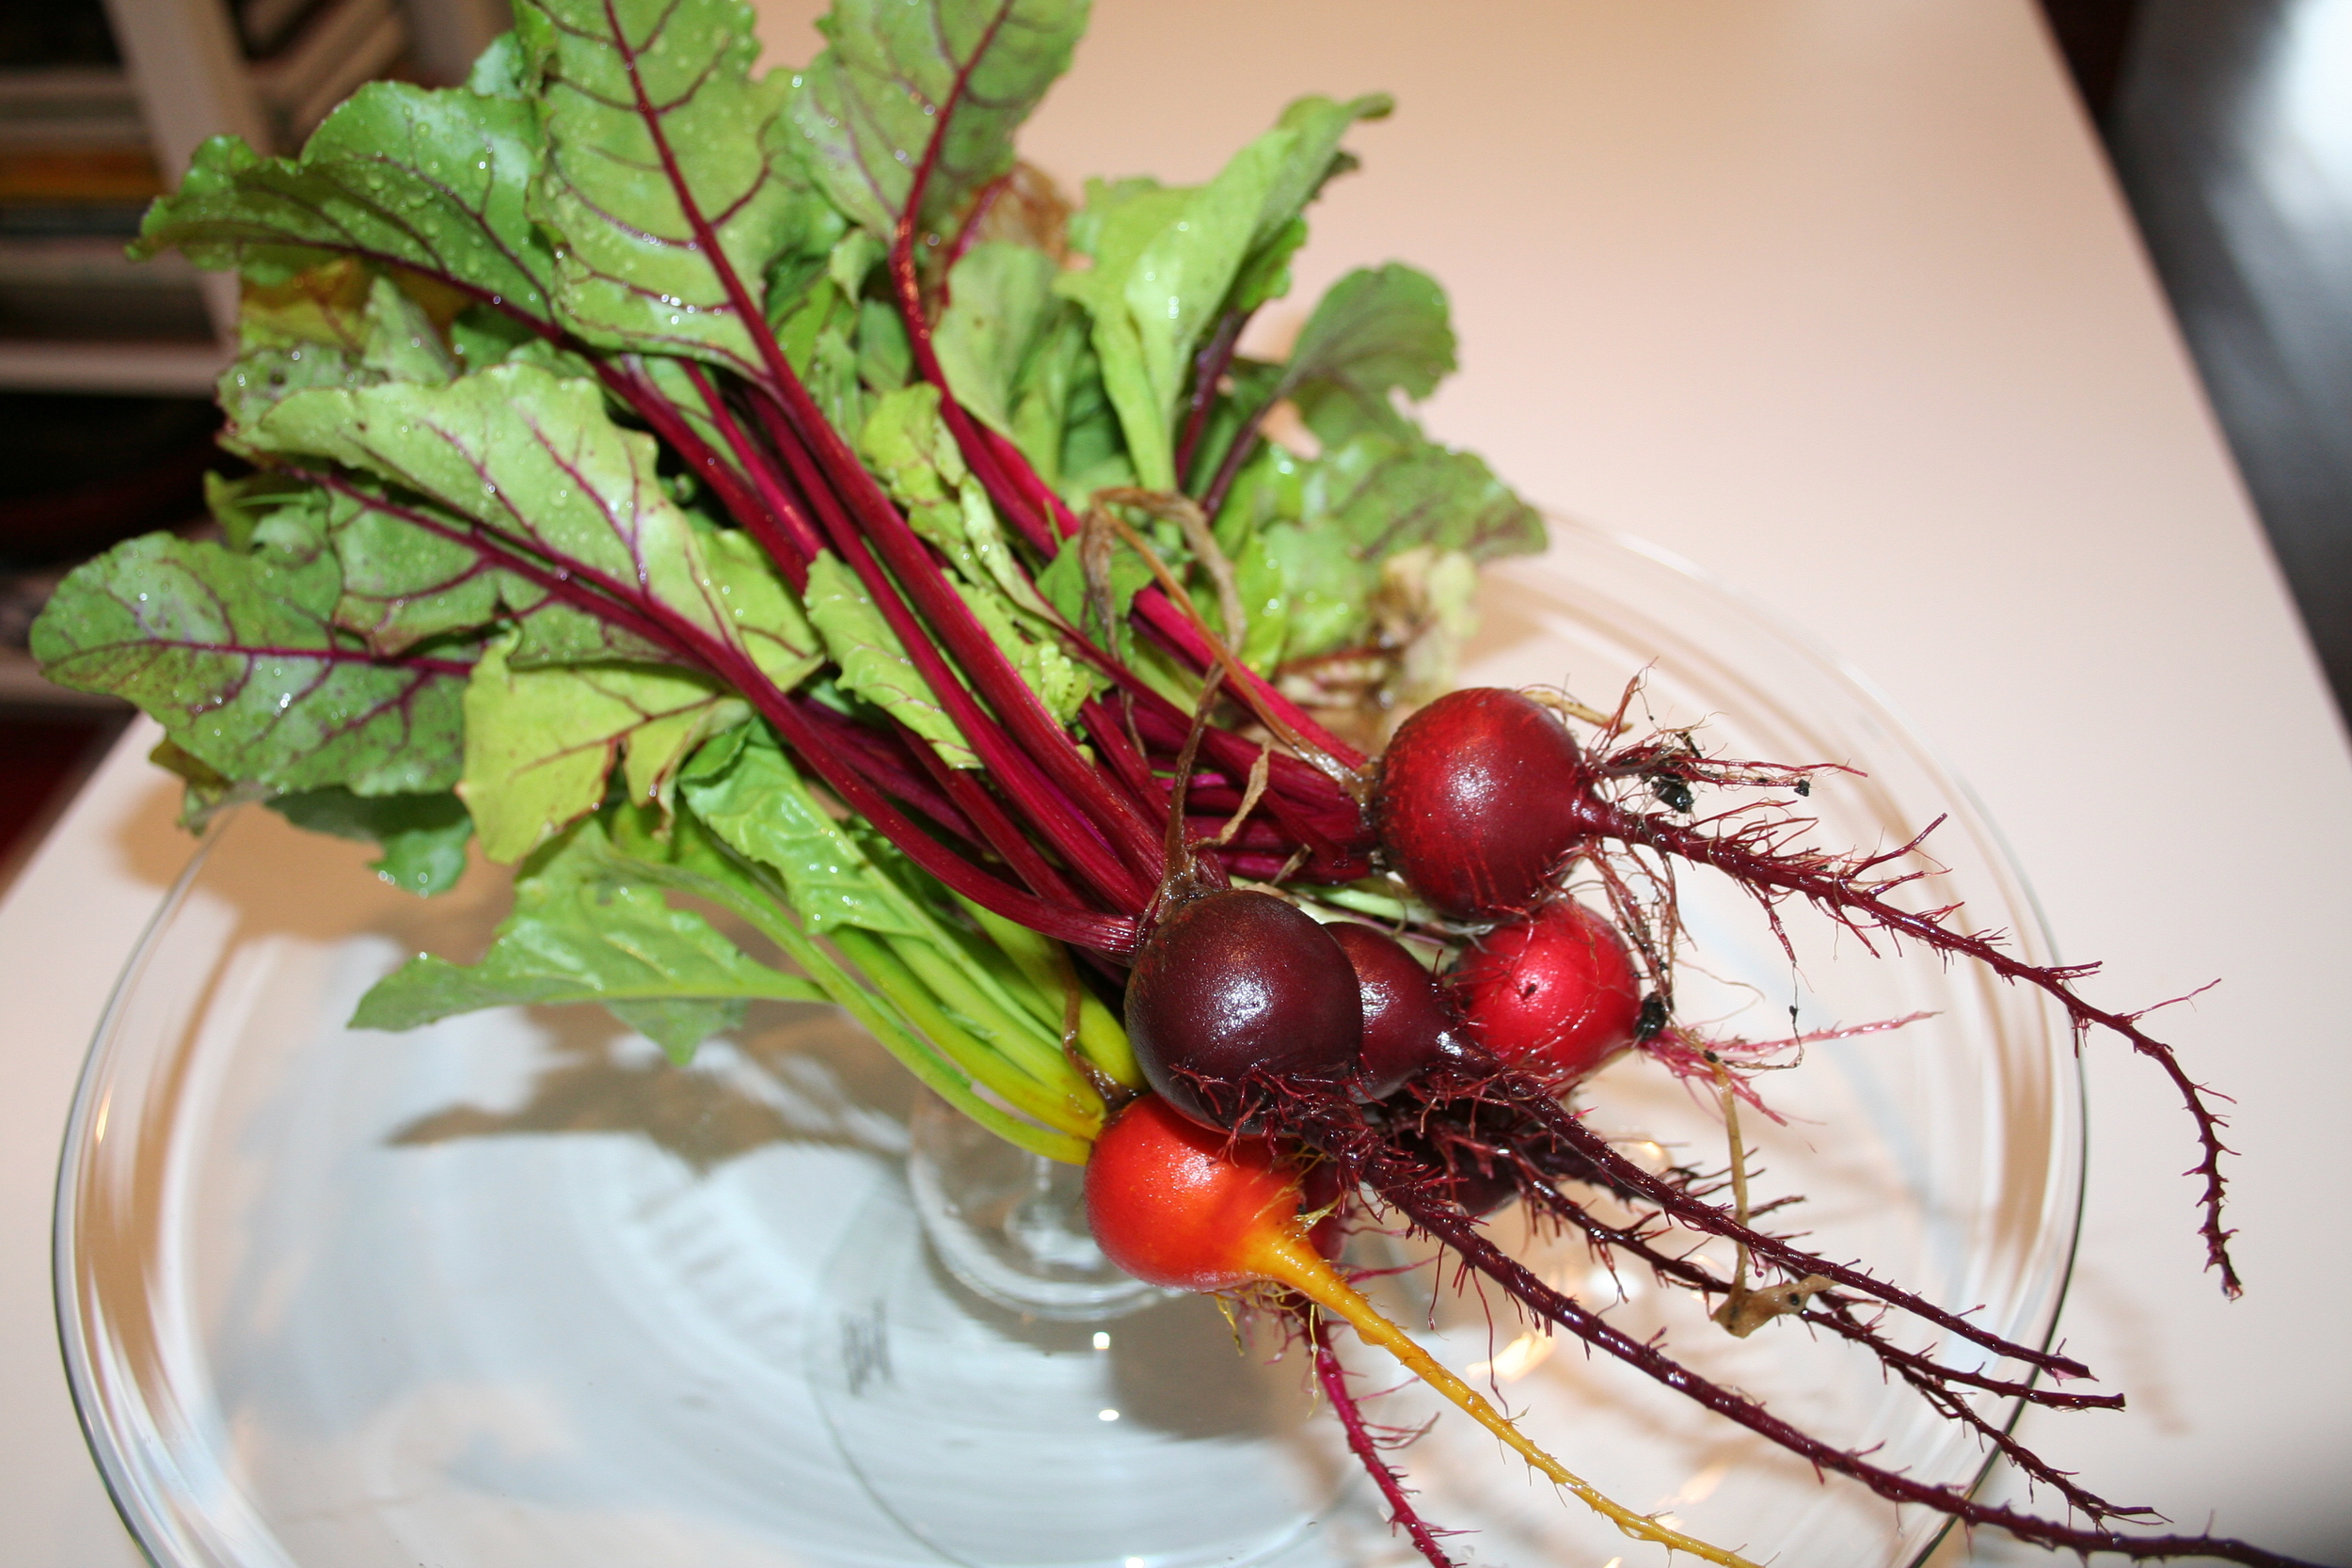
Sunset Green Home Garden Beets.JPG

We even eat nasturtiums and make chamomile tea from our companion flowers!

Sunset Green Home Garden Nasturtiums.JPG

No fossil fuels are burned to move the food from my garden to my kitchen.  And I know exactly what has gone into producing what we eat – sunshine, water, homemade compost and organic seeds!

That’s what the LEED green building program had in mind when it approved a credit for building a food garden.  And when we move our garden beds to higher ground once the Sunset Green Home is built, we plan to earn the food garden point!

Gardening is easy and healthful.  And you don’t need to build a LEED home to start a garden.  So what are you waiting for?  Find a sunny spot, build a garden bed, and grow local.  Happy gardening!

Leave a comment!  Tell us your best gardening story, or let us know about a special variety that you plant in your own garden...

Grow Green! Start with Raised Planting Beds

Some sustainable practices are easily incorporated into your life and will bear fruit right away.  Pun intended!  It’s cold and snowy here in NYC, but I’m already thinking about the inevitable arrival of spring…and for me that means gardening.

Sunset Green Home garden in midsummer bloom.

Sunset Green Home garden in midsummer bloom.

Raised bed gardening is an easy, space efficient, and healthful way to go green.  By growing your food yourself, you'll know that you aren't ingesting any harmful pesticides and that no fossil fuels were burned to get the food to your doorstep.  And growing your own produce also contributes to biodiversity; you can pick from the many heirloom varieties that cannot be grown by commercial growers whose crops are often limited to ones that have been engineered to hold up to handling and transportation.  If that’s not enough to convince you, just wait until you taste a fresh asparagus spear straight out of the ground – it’s better than the best you’ll find in your local grocery store!

Now that you’re convinced, how can you make your garden a reality? 

Building Sunset Green Home Garden Beds.JPG
Raised Garden Bed Under Construction.JPG
Raised Bed Garden Under Consruction.JPG

To build our raised garden beds, we used untreated cedar for its natural pest-resistant properties (redwood would have been fine, too). Consider using wood that has been certified by the Forest Stewardship Council (FSC), which has been sustainably grown and harvested.  There’s been a lot of debate about using untreated vs. pressure treated wood for garden beds. Pressure treated wood will last longer than untreated wood, but doesn’t meet organic gardening standards. However, the National Gardening Association says that new ACQ pressure treated lumber is safe to use for garden beds.

Sunset.com has a great tutorial on building raised garden beds.  We used their plans with a couple of modifications to build our first 18” high raised beds (most notably, Sunset's plans are for 12" high beds; we added a row of 2 x 6 boards to increase the height). They’re beautiful and have withstood the test of time.  Working together with my father and my sons, we were able to build and install three 4 x 8 foot beds in one day (it helped that the lumber yard pre-cut the boards to the lengths we needed). 

For clients and friends (and for my own garden expansion), I have relied on raised bed corners and connectors from Gardeners.com to assemble raised beds in a jiffy. 

Regardless of which design you choose for the boxes, make sure you incorporate these elements into your plan:

1.       Keep your beds to a maximum of four feet wide.  Three to four feet is ideal.  It’s hard to reach the produce in the middle of a bed that is more than four feet wide without stepping on or leaning into the soil and causing it to become compacted. 

2.       Lay down ¼” metal mesh Hardware Cloth in the bottom of your planting boxes to prevent tunneling pests (moles come to mind!) from reaching your produce

3.       Staple Landscape Fabric to the inside faces (but not the bottom!) of your planters to keep your soil from leaking through the cracks between your boards when you water, and to protect the wood from excess moisture

4.       Install drip irrigation on a timer with a separate manual cut off valve if you have multiple beds.  Some fruits – notably watermelons – don’t want to be watered at all once their fruit has set…but you may not want to set up separate watering zones for each bed.  A manual cut off will easily solve the problem.

5.       Once you have prepared your beds, fill them with a good quality mix of organic topsoil, compost and peat. 

In my Plant Hardiness Zone, I can start planting some of my early crops as soon as next month.  SproutRobot has a neat tool for determining when you can start planting outdoors where you live.  Make sure you get your raised beds built in time to be ready to start planting.  And bookmark my Garden Journal so you can check back throughout the spring as I add tips for crop selection and low maintenance growing.

Happy gardening!